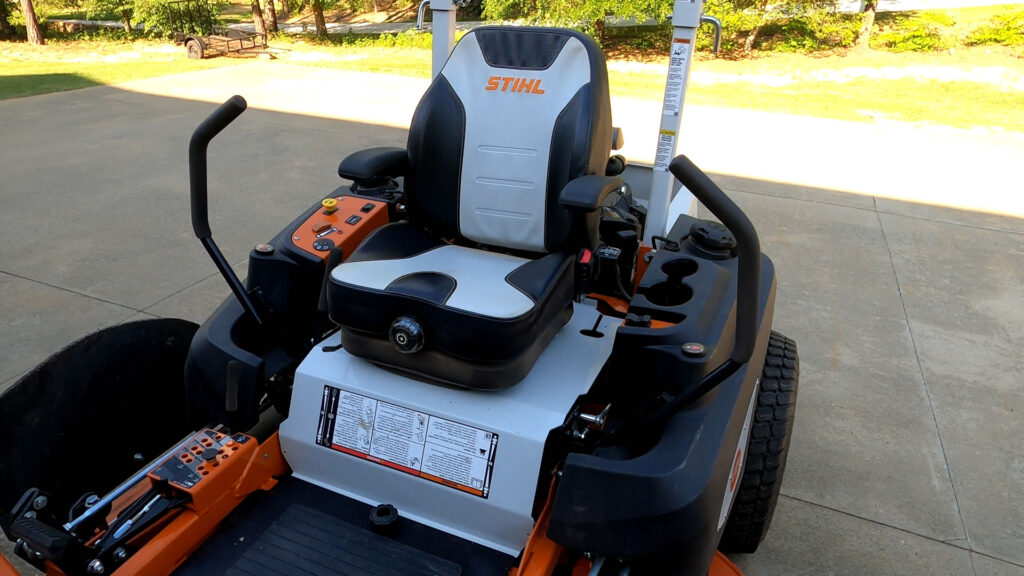
The STIHL RZ 960i K is an absolute powerhouse of a commercial zero-turn mower. Packing a roaring 38.5 hp EFI Kawasaki engine and a massive, fabricated 60-inch cutting deck, this machine is engineered to tear through large acreage effortlessly.
However, even the toughest commercial steel loses its edge over time. Dull blades don’t just make your lawn look ragged; they force your engine to work harder and burn more fuel.
Swapping out the blades on your RZ 960i K is a straightforward maintenance task that you can tackle right in your garage. Let’s dive into how to do it safely, what tools you need, and which replacement blades fit your massive 60-inch deck.
Table of Contents
Choosing Your Weapon: STIHL 60″ Factory Blade Options
Because the RZ 960i K utilizes a heavy-duty, commercial-grade 60-inch deck, it requires a 3-blade set of 21-inch blades to achieve its full cutting width. STIHL offers two primary factory configurations depending on how you manage your turf discharge.
| Blade Type | Best Used For | OEM Part Number (3-Pack) |
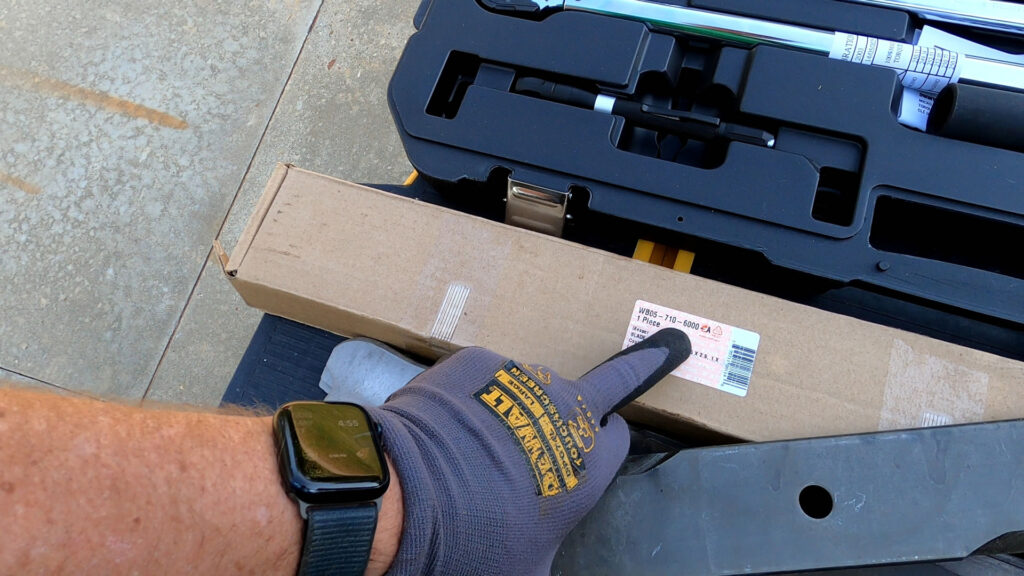
| Standard/High Lift Blades | Maximum vacuum and clean discharge performance; best for bagging or side-discharging thick, tall grass. | WB05 710 6000 |
| Mulching Blades | Finely chopping grass clippings to feed nutrients back into the soil; requires a mulching kit/baffle installed on the deck. | WB05 710 6030 |
Pro Tip: Always verify your specific spindle and fitment size before ordering, but the WB05 series is the standard blueprint for STIHL’s commercial 60-inch decks.
Tools and Prep Checklist
Before you begin, gather the following gear:
- A 15/16″ socket (or the correct size socket for your specific spindle bolts)
- A heavy-duty breaker bar or impact wrench
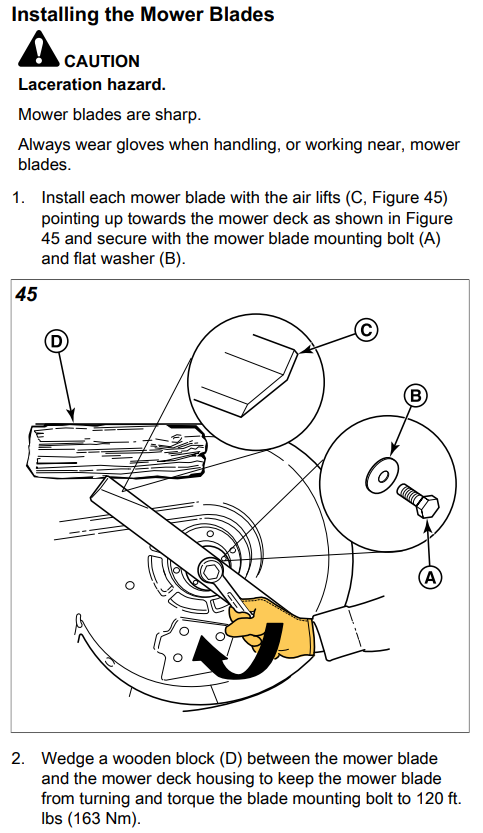
- A torque wrench capable of reaching 250 ft-lbs (always check your manual for exact spec), my machine manual stated 120 ft. lbs as seen in image below.
- Thick leather work gloves
- A block of wood (2×4) to jam the blades
- Safety glasses
Step-by-Step Blade Replacement
1.Secure the Mower:Safety First.
Park the mower on a flat, level surface. Engage the parking brake, shut off the ignition, and remove the key. For ultimate safety, lift the seat and disconnect the spark plug wires so there is zero chance of an accidental engine start.
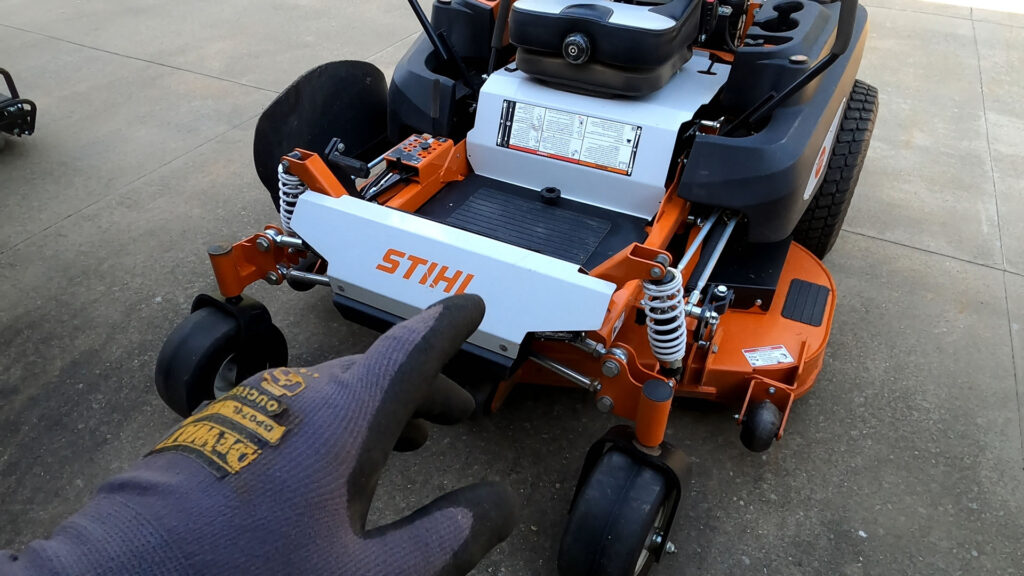
2.Gain Access to the Deck:Lift and Support.
Use the foot pedal to raise the deck to its highest transport position. If you are using a mower jack or car ramps to access the underside, ensure the rear wheels are properly chocked and the front is stabilized with heavy-duty jack stands. Never trust a hydraulic jack alone.
3.Lock the Blade in Place:Prevent Rotation.
Put on your heavy leather gloves. Wedge a block of wood (like a scrap 2×4) between the tip of the mower blade and the inside wall of the deck shielding. This binds the blade safely so it won’t spin when you apply force to the bolt.
4.Loosen the Spindle Bolt:Lefty-Loosey.
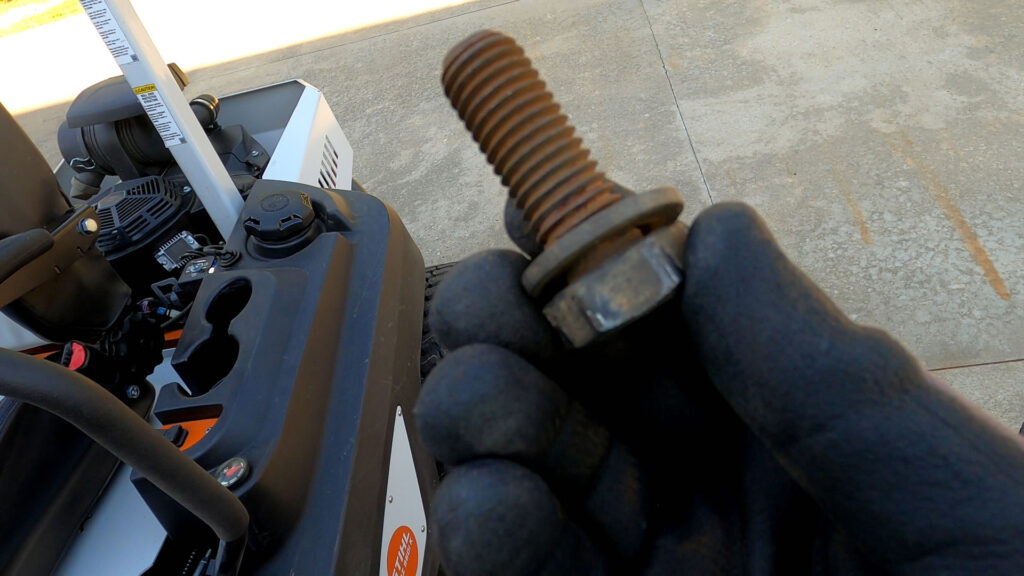
Using your 15/16″ socket and a breaker bar (or an impact wrench), turn the spindle bolt counterclockwise to loosen it. Commercial spindle bolts can be incredibly tight due to dirt and torque. Remove the bolt, the heavy washer, and the old blade. Keep track of the order the hardware came off!
5.Install the New Blade:Orientation Matters.
Position your new STIHL blade (e.g., Part WB05 710 6000) onto the spindle shaft. CRITICAL STEP: Ensure the “sail” or the curved lift fins of the blade are pointing up toward the inside underside of the deck, and the flat cutting edge faces the grass. Putting it on upside down will ruin your lawn and damage the machine.
6.Torque to Specification:Lock it Down.
Reinstall the washer and spindle bolt by hand to ensure you don’t cross-thread it. Wedge your block of wood on the opposite side of the deck wall to prevent clockwise rotation. Use your torque wrench to tighten the bolt securely to factory specification (typically between 118 to 120 ft-lbs for commercial decks). Repeat the process for the other two blades.
Post-Install Checklist
Before you drop the mower back down and head out to the yard, take 60 seconds to do a quick quality check:
- Spin Check: Carefully rotate the blades by hand to ensure they spin freely, don’t hit the deck walls, and aren’t misaligned or hitting each other.
- Re-connect Spark Plugs: Reattach your spark plug boots under the seat.
- Initial Test Run: Lower the machine, start the engine in an open area, and engage the PTO at low throttle. Listen for any unusual vibrations or knocking sounds before driving into heavy grass.
Replacing your blades every 25 to 50 mowing hours (or sharpening them regularly) keeps your RZ 960i K operating like the elite commercial machine it is. Happy mowing!garden care. Mulch your leaves, feed your soil, and let nature do the rest.
Check out my blog for more videos on maintaining a Bermuda lawn.
Hope you enjoy the video below:
Products recommended/used in this video:
Visit my online shop for T-Shirts and more!